Hi!
To color any pixels in the evalscript any color, you can just use an if statement, like so:
if (condition){
  return [1,1,1]
}
White color equals to [1,1,1], as 1 means full 255 for that channel. On the contrary, [0,0,0] would mean black, [1,0,0] would show red, [0,1,0] would show green, [0,0,1] would show blue, and [0.5, 0 ,1] would result in violet.
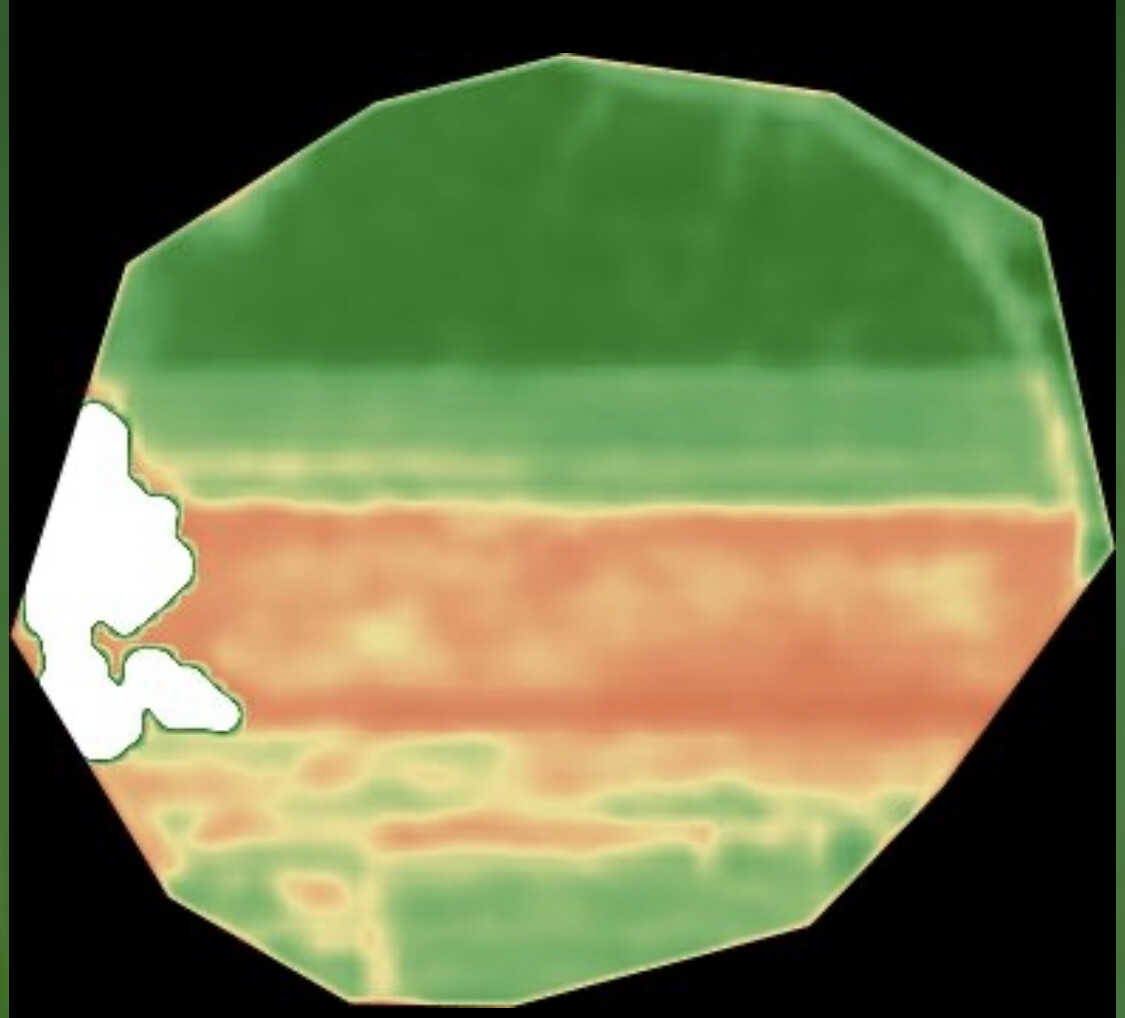
To show clouds in white, the simplest way is to specify an if statement, that if the S2L2A CLM (cloud mask band) equals to 1, the white color is returned, and then just copy your NDVI visualization into the else statement.
For example, with the NDVI visualization from EO Browser, the script would look like this:
let ndvi = (B08 - B04) / (B08 + B04);

if (CLM == 1){
  return [1,1,1]
}
else{
if (ndvi<-1.1) return [0,0,0];
else if (ndvi<-0.2) return [0.75,0.75,0.75];
else if (ndvi<-0.1) return [0.86,0.86,0.86];
else if (ndvi<0) return [1,1,0.88];
else if (ndvi<0.025) return [1,0.98,0.8];
else if (ndvi<0.05) return [0.93,0.91,0.71];
else if (ndvi<0.075) return [0.87,0.85,0.61];
else if (ndvi<0.1) return [0.8,0.78,0.51];
else if (ndvi<0.125) return [0.74,0.72,0.42];
else if (ndvi<0.15) return [0.69,0.76,0.38];
else if (ndvi<0.175) return [0.64,0.8,0.35];
else if (ndvi<0.2) return [0.57,0.75,0.32];
else if (ndvi<0.25) return [0.5,0.7,0.28];
else if (ndvi<0.3) return [0.44,0.64,0.25];
else if (ndvi<0.35) return [0.38,0.59,0.21];
else if (ndvi<0.4) return [0.31,0.54,0.18];
else if (ndvi<0.45) return [0.25,0.49,0.14];
else if (ndvi<0.5) return [0.19,0.43,0.11];
else if (ndvi<0.55) return [0.13,0.38,0.07];
else if (ndvi<0.6) return [0.06,0.33,0.04];
else return [0,0.27,0];
}
See it in EO Browser.
You could use any NDVI visualization - we have several available on our Custom script repository. For example, for another NDVI visualization with valueInterpolate, the script would look like this:
let ndvi = (B08 - B04) / (B08 + B04);

if (CLM == 1){
  return [1,1,1]
}
else{
return valueInterpolate(ndvi,
   [-0.2, 0, 0.1, 0.2, 0.3, 0.4, 0.5, 0.6, 0.7, 0.8, 0.9, 1.0 ],
   [[0, 0, 0],							   //  < -.2 = #000000 (black)
    [165/255,0,38/255],        //  -> 0 = #a50026
    [215/255,48/255,39/255],   //  -> .1 = #d73027
    [244/255,109/255,67/255],  //  -> .2 = #f46d43
    [253/255,174/255,97/255],  //  -> .3 = #fdae61
    [254/255,224/255,139/255], //  -> .4 = #fee08b
    [255/255,255/255,191/255], //  -> .5 = #ffffbf
    [217/255,239/255,139/255], //  -> .6 = #d9ef8b
    [166/255,217/255,106/255], //  -> .7 = #a6d96a
    [102/255,189/255,99/255],  //  -> .8 = #66bd63
    [26/255,152/255,80/255],   //  -> .9 = #1a9850
    [0,104/255,55/255]         //  -> 1.0 = #006837
   ]);
}
See it in EO Browser.
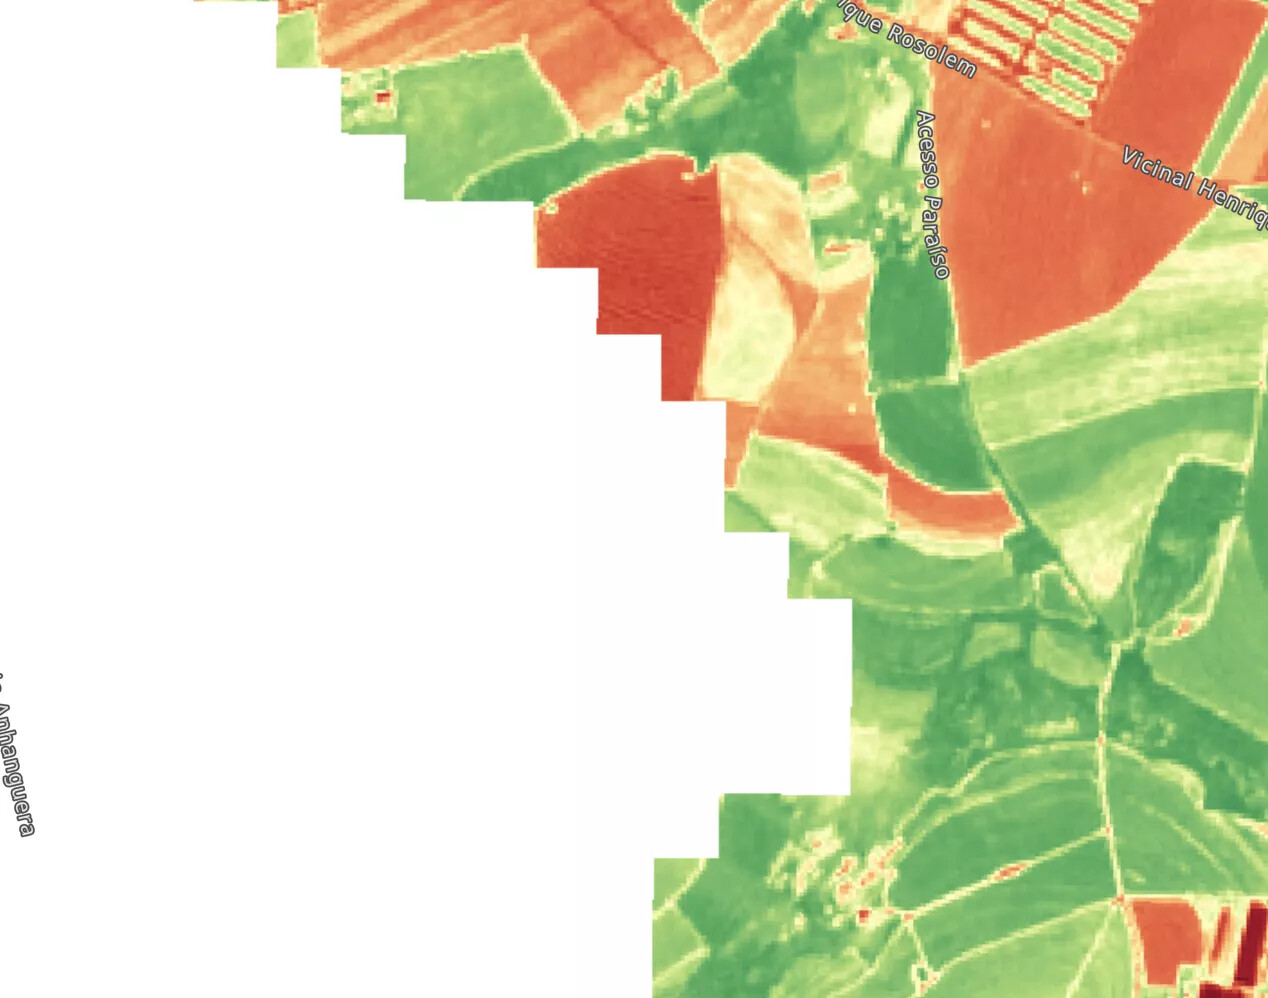
If you wanted to return the cloud pixels transparent instead of white, you could also do that, by returning 4 channels everywhere - in the 4. channel you would put 0 if you want the pixel transparent, and 1 if you want it displayed. In the example below, all the outputs of the NDVI got the additional fourth output channel set to 1, as we want all the colors displayed, while the CLM got 0, to display it transparent.
let ndvi = (B08 - B04) / (B08 + B04);

if (CLM == 1){
  return [1,1,1,0]
}
else{
return valueInterpolate(ndvi,
   [-0.2, 0, 0.1, 0.2, 0.3, 0.4, 0.5, 0.6, 0.7, 0.8, 0.9, 1.0 ],
   [[0, 0, 0,1],							   //  < -.2 = #000000 (black)
    [165/255,0,38/255,1],        //  -> 0 = #a50026
    [215/255,48/255,39/255,1],   //  -> .1 = #d73027
    [244/255,109/255,67/255,1],  //  -> .2 = #f46d43
    [253/255,174/255,97/255,1],  //  -> .3 = #fdae61
    [254/255,224/255,139/255,1], //  -> .4 = #fee08b
    [255/255,255/255,191/255,1], //  -> .5 = #ffffbf
    [217/255,239/255,139/255,1], //  -> .6 = #d9ef8b
    [166/255,217/255,106/255,1], //  -> .7 = #a6d96a
    [102/255,189/255,99/255,1],  //  -> .8 = #66bd63
    [26/255,152/255,80/255,1],   //  -> .9 = #1a9850
    [0,104/255,55/255,1]         //  -> 1.0 = #006837
   ]);
}
See it in EO Browser.
You can find more complex cloud masking algorithms and cloudless mosaics on the Repository and learn more about cloud masks in our documentation, but the general principle of coloring the pixels and setting conditions is the same. For more information on transparency, check this guide.
If you would like to learn more about custom scripts, you can check out our blogs, tutorials and webinars, which can be accessed on our Custom scripts website.